Solar Viewer

How to Build a Solar Viewer that Will Allow You to Safely View a Projected Image of the Sun
What you need
– two pieces of white card or a long box
– aluminium foil
– a pin
– binoculars or telescope (optional)
What to do:
1. Cut a five centimetre square in the centre of one piece of card.
2. Use a piece of aluminium foil to cover the square hole and tape to the card. Pierce a small hole in the centre of the foil using a pin or the sharp end of a pencil.
3. Stand with your back to the Sun and hold the card with aluminium foil above your shoulder or to your side, in the direction of the Sun. Use the other piece of cardboard to show the light passing through the hole in the aluminium foil.
4. By changing the distance between the two pieces of card you can change the size and brightness of the Sun’s image.
5. Holding the two pieces of card approximately one metre apart works best. If using a box, simply put the box over your head and look at the projection. You may feel silly, but it’s the safest way if you don’t have other equipment.
The length of the box is important. The longer the box, the bigger the pinhole image. To find the size of the image, multiply the length of the box by the number 0.0093. For a box that is 1 meter long, the image will be 0.0093 meters (or 9.3 mm) in diameter. If your box is 5 feet (60 inches) long, your solar image will be 60 x 0.0093 = 0.56 inches in diameter. If you want to round things off, the size of the image is about 1/100th the length of the box.
An alternative is to use a telescope or pair of binoculars to project an image of the Sun.
At no time should you look through the binoculars or telescope to view the Sun.
If you use binoculars attach them to a tripod and cover one lens with a piece of card.
Aim the binoculars or telescope at the Sun and project the image on to a screen or wall.
To protect the binoculars or telescope from becoming hot and overheating, turn it away from the Sun every minute or so.
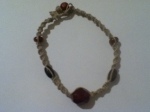
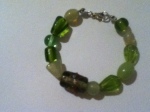
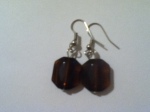
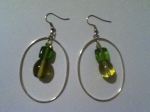
Healing Items
Crown Chakra
Enlightenment.
Stones that are beneficial to the Crown Chakra are Clear Quartz, Moonstone, Ocean Jasper, Blue Lace Agate, Tourmilated Quartz.
These talisman are full of positive energy, support and well-being. Helping to calm an over active or stressed mind. Reminding you to meditate and connect with stillness.
Third Eye Chakra
Intuition.
Stones that are beneficial to the Third Eye Chakra are Amethyst, Lapiz, Lepidolite, Sugilite, Fluorite, Clear Quartz.
These talisman encourages you to trust your inner voice, listen to your heart and trust your intuition… For it will never let you down.
Throat Chakra
Expression.
Stones that are beneficial to the Throat Chakra are Lapiz, Amazonite, Blue Lace Agate, Sodalite, Chrysoprase, Aqua Marine, Turquoise.
These talisman will help release your energy and open your voice by encouraging honesty, self-truth, individuality and creativity.
Heart Chakra
Love.
Stones that are beneficial to the Heart Chakra are Jade, Rose Quartz, Malachite, Rhodonite, Rhodochrosite, Aventurine.
These talisman will help you to find inner peace through compassion and self-love. Respecting ones own boundaries so you can be in healthy relationships, awakening the romantic in you.
Solar Plexus
Abundance.
Stones that are beneficial to the Solar Plexus Chakra are are Citrine, Yellow Calcite, Amber, Smokey Quartz, Mookite, Tigers Eye, Rutilated Quartz.
These talisman will help instill feelings of confidence, abundance, and belief in your own potential. Manifests what you truly desire.
Sacral Chakra
Creation.
Stones that are beneficial to the Sacral Chakra are Red Aventurine, Red Jasper, Moon Stone, Smokey Quartz, Carnelian, Tiger Eye, Fire Agate.
These talisman will help connect you to Mother Earth. Helping you to embrace the unknown and start a new cycle without fear, embracing fertility and growth, vitality and love of life.
Base Chakra
Grounding.
Stones that are beneficial to the Base Chakra are Hematite, Red Jasper, Smokey Quartz, Black Obsidian, Snowflake Obsidian, Tiger Iron, Mookite, Tigers Eye.
These talisman will encourage grounding, inner strength, action, and stability.
Balance All Chakras
Equilibrium.
These talisman help you feel more centered, help align your energies and find emotional balance. Used as a way to connect to the moment you are in.
In meditation, bring your attention to each of your chakra points, by working through the rainbow spectrum. Focusing on each of your energy centres as you go. They will help to align and balance your energy centres.


Dreamcatchers
Legend of the Dreamcatcher
Native Americans of the Great Plains believe the air is filled with both Good and Bad Dreams.
According to legend, the Good Dreams pass through the center of the hole to the sleeping person. The Bad Dreams are trapped in the web, where they perish in the light of dawn. Good Dreams would pass through and slide down the Feathers to the sleeper.
Traditionally, Dreamcatchers are hung in the tipi or lodge, and on the baby’s cradle board.


Candles
Chunk Candles
Double Action Candles
Flare Candles
Hand Carved Candles
Hand Dipped Candles
Holiday Candles
Plaiting Candles
Reversible Candles
Sand Candles
Snow Candles
Triple Action Candles
Twisted Candles
Wildflower Candles

Aromatherapy
Bath and Beyond

Bath Bags
Bath Oils
Bath Salts
Bubble Baths
Ice Packs
Milk Baths
Perfumes
Sachets
Soaps
Sundial Bridge, Redding, California
The Sundial Bridge is a cantilever spar cable-stayed bridge that spans the Sacramento River in Redding, California. It was designed by Santiago Calatrava and completed in 2004 at a cost of US$23,000,000. Similar to his earlier (1992) design (the Puente del Alamillo in Seville, Spain), the bridge does not balance the forces by using a symmetrical arrangement of cable forces on each side of the tower; instead it uses an angled cantilever tower loaded by cable stays on only one side. This requires that the spar resist bending and torsional forces and that its foundation resists overturning.
While this leads to a less structurally efficient structure, the architectural statement is dramatic. This ‘greenbridge’ features a single 217 foot (66 metre) mast that serves as the gnomon of the world’s largest sundial. Sundial Bridge’s shadow is cast upon a large dial to the north of the bridge, though the shadow cast by the bridge is exactly accurate on only one day in a year – the summer solstice, June 21. The tip of the shadow moves at approximately one foot per minute so that the Earth’s rotation about its axis can be seen with the naked eye.
Sundial Bridge provides pedestrian access to the north and south areas of Turtle Bay Exploration Park, a complex containing environmental, art and history museums and the McConnell Arboretum and Gardens, and to the Sacramento River Trail.
Oregon Caveman – Grants Pass, Oregon
Grants Pass, Oregon is the home to the Oregon Caveman, a stunning 17-foot replica of early man constructed by the “Caveman Club” back in 1971.
He proudly stands on his rock pedestal and guards the entrance to the town. After more than 30 years on guard, the Caveman finally got a much-needed fiberglass makeover in 2004 and resumed his post overlooking the town in 2005.
Mammy’s Cupboard – Natchez, Mississippi
Mammy’s Cupboard is a restaurant shaped like a 28-foot tall black woman in a gigantic skirt. At least, she appears to be a woman, but you’ll be hard pressed to find a more frightening face on this roadside attraction. The restaurant itself is open for lunch Tuesdays – Saturdays and really is an interesting stop. The building is severely decayed, but rumors say the statue has been repaired. I guess, you’ll just have to find out for yourself.
Astronomy Links

This spectacular image was taken recently by the Hubble telescope.
‘Geysers’ such as this are typically formed from hot gas from a newborn star that splashes up against the dense core of a cloud of molecular hydrogen. However, investigation of Herbig-Haro 110 (pictured) has failed to reveal a source star, making it something of a mystery.


Beverly Hills City Hall, California
The Beverly Hills City Hall has gracefully presided over the city’s civic life since 1932 and has become famous the world over after being used in several blockbuster films such as Beverley Hills Cop.
Architect William Gage created the Spanish Renaissance building in typical government style of that era. The low classical base, which symbolizes government, is dominated by an eight-story tower, which represents commerce. But the beauty of the building, with its tiled dome and gilded cupola, soon transcended the typical government building and has become a beloved local landmark.
Renovated to meet new safety and earthquake codes in 1982 the rich architectural details were carefully maintained. Inside, the terrazzo floors, marble walls and intricate ceilings were cleaned and restored. Outdoors, grime was meticulously removed from the blue, green and gold tile on the dome and gilded cupola.
Christmas Wreath

Materials
- A lot of Green and Red Construction Paper
- Pencil
- Scissors
- Glue
- Glitter or glitter glue
- Red or Green Ribbon
Instructions
- Trace your hand on a piece of construction paper and then cut it out at least 10 hand prints for each wreath.
- Next, glue the hand prints together at the wrists, overlapping slightly, in a circle.
- At this point you can add hearts like William wanted, or a nice red bow, glitter, stickers, add stringed pop corn by weaving it through the fingers… Whatever you can think to add…

My kids chose red, green, yellow and brown for fall instead of Christmas, even though we were doing a Christmas project. -laughs- They told me “75′ degree weather, did not classify as winter.” It’s not in the teens at the moment so how could I argue? Then they used their hand prints as well as their younger brother and sister’s hand and foot prints… and Little Bill insisted it wasn’t complete without a heart at the top.
Funny Photographs

Materials
- Magazines
- Heavy Construction Paper
- Scissors
- Paste
Instructions
- Draw the shape of the head on a piece of heavy construction paper.
- Look through magazines and find eyes, ears, lips and a nose for your face. Maybe you could pick 2 different color eyes or a really big nose and little ears. The choice is yours.
- After you cut them out, glue the pieces on to the head that you have drawn on your paper.
- Now do you want to add accessories? A mustache, a beard, a cane and a top hat? A necklace, earrings, maybe a silly hair style?
- Finally look for arms, legs, shoes…
- Be as creative as you can be. The point is to have fun and make a silly photograph!
- If you really wanna spice the picture up, You can add an unusual background. Maybe skiing in the desert, or wearing a swim suit in the snow… So on and forth.
- Now if you really want to give it so personality, add funny objects, unusual pets, or make the people do silly things.


You must be logged in to post a comment.